Add a touch of whimsical, gothic sweetness to your spooky season decor with this cute mini crochet bat pattern. Measuring just under three inches tall with delightfully scalloped gothic wings and tiny pointed ears, this pocket-sized amigurumi works up in just 20 minutes using basic stitches and leftover scrap yarn. Whether you string a flock of these nocturnal cuties into a mantle garland, suspend them upside-down from rustic twigs, or gift them as candy-free Halloween party favors, this step-by-step beginner tutorial guides you seamlessly through every round.
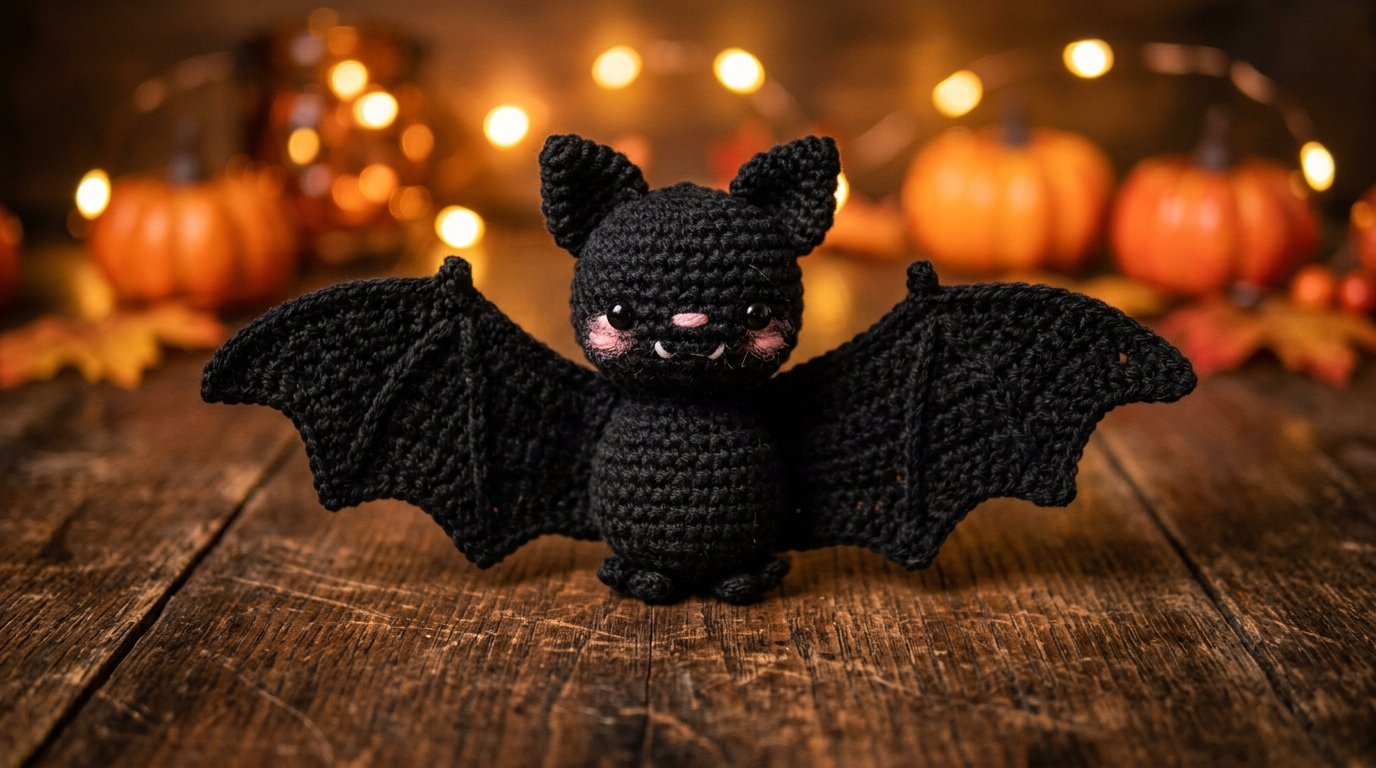
Unlike complex amigurumi toys that require hours of fiddly assembly, this little bat is designed with maker efficiency at its heart. The round head and body are crocheted in a single seamless continuous spiral, while the distinctive scalloped wings are worked flat in simple rows that incorporate dramatic picot-style points. Fastening the wings takes merely a minute, making this pattern the ultimate high-reward, fast-turnaround project for autumn craft fairs and busy holiday schedules.
Why You’ll Love This Crochet Bat Pattern
- Lightning Fast 20-Minute Make: Perfect for satisfying evening crochet sessions or whipping up last-minute handmade Halloween gifts.
- Zero Waste Scrap Buster: Requires less than 30 yards of yarn in total, allowing you to use up partial skeins of black, charcoal, or deep plum.
- Beginner-Friendly Shaping: Simple continuous spiral increases and decreases with no complicated short rows or wire armatures.
- Versatile Display Options: Add a small baker’s twine loop to turn it into an ornament, stitch a safety pin to the back for an autumn broach, or nestle it alongside mini white pumpkins on a tiered tray.
Materials & Sizing Specs

- Yarn: Approx. 25 yards of Medium Worsted Weight (#4) Cotton Yarn in Charcoal Black, Midnight Plum, or Slate Gray. Cotton yarn provides crisp stitch definition and firm structural stability for the tiny ears and wings.
- Crochet Hook: US Size E-4 (3.5 mm). Using a slightly smaller hook creates an ultra-dense amigurumi fabric that completely conceals the white polyfill stuffing inside.
- Eyes: Two 6mm black safety eyes, or a small length of black embroidery thread to embroider sleepy crescent eyes (recommended if gifting to babies or pets).
- Stuffing: A small handful of polyester fiberfill.
- Notions: Locking stitch marker, blunt yarn needle, sharp scissors.
- Finished Dimensions: Approx. 2.75 inches (7 cm) tall with a 5.5-inch (14 cm) wingspan.
- Skill Level: Easy / Advanced Beginner (magic ring, single crochet, half double crochet, and simple seaming).
Step-by-Step Crochet Bat Tutorial

Part 1: The Seamless Body & Head
Worked from the top of the head downward in a continuous spiral without joining rounds. Use a stitch marker to track the start of each round:
Round 1: Make a Magic Ring. Ch 1, work 6 sc into ring. Pull ring securely tight. (6 sts)
Round 2: Work 2 sc in each st around. (12 sts)
Round 3: *1 sc in next st, 2 sc in following st.* Repeat from * to * around. (18 sts)
Round 4: *1 sc in next 2 sts, 2 sc in following st.* Repeat from * to * around. (24 sts)
Rounds 5–9: Work 1 sc in each st around. (24 sts across 5 rounds)
Note: If using safety eyes, insert them between Rounds 6 and 7, spaced approximately 4 stitches apart.
Round 10: *1 sc in next 2 sts, sc2tog (decrease).* Repeat from * to * around. (18 sts)
Round 11: Work 1 sc in each st around. (18 sts)
Stuff the head and upper body firmly with polyfill.
Round 12: *1 sc in next st, sc2tog.* Repeat from * to * around. (12 sts)
Round 13: Sc2tog around 6 times. (6 sts)
Fasten off leaving an 8-inch tail. Thread tail onto tapestry needle, weave through front loops of remaining 6 stitches, pull tight to cinch closed, and bury tail inside body.
Part 2: The Pointed Ears (Make 2)
Worked in a small neat spiral:
Round 1: Magic Ring, ch 1, work 4 sc into ring. Pull closed. (4 sts)
Round 2: *1 sc in next st, 2 sc in following st.* Repeat twice. (6 sts)
Round 3: *1 sc in next st, 2 sc in following st.* Repeat 3 times. (9 sts)
Fasten off leaving a 10-inch tail for sewing. Do not stuff. Pinch flat into cute triangular bat ears.
Part 3: The Scalloped Gothic Wings (Make 2)
Worked flat in turning rows to create the arched wing silhouette:
Row 1: Ch 11. Sc in 2nd ch from hook and in each remaining ch across. Turn. (10 sts)
Row 2: Ch 1, sc in next 8 sts, leave last 2 sts unworked to create the wing angle. Turn. (8 sts)
Row 3: Ch 1, sc across all 8 sts. Turn. (8 sts)
Row 4 (Scalloped Edging): *Sl st in first st, [1 hdc, 1 dc, ch 2, sl st in first ch (picot point), 1 hdc] all in next st, sl st in following st.* Repeat across the bottom edge to create 3 dramatic wing scallops.
Fasten off leaving a 12-inch tail for seaming.
Part 4: Final Assembly & Facial Detailing
1. Attach Ears: Using your tapestry needle, position the flattened ears on top of the head between Rounds 2 and 4, angled slightly outward. Whipstitch securely through both thicknesses and bury tails into the body.
2. Attach Wings: Align the straight top edge of each wing along the sides of the body between Rounds 7 and 11, ensuring both wings mirror each other evenly. Sew firmly along the straight edge so the scalloped tips fan out slightly.
3. Embroider Details: Using a scrap of white embroidery thread or yarn, stitch two tiny downward fangs directly beneath the eyes for an irresistible spooky-sweet expression!
3 Maker Secrets for Flawless Mini Amigurumi
1. The “Yarn Under” Single Crochet Trick: When working amigurumi in the round, try yarning under instead of yarning over (sc x-stitch). This creates a tighter, square-shaped stitch lattice with zero diagonal bias, virtually eliminating gaps where polyfill might peek through.
2. Firm Stuffing with Teased Polyfill: Never push large clumps of fiberfill into tiny amigurumi. Instead, pull your polyfill into light, fluffy clouds before feeding it in small pinches. This prevents unsightly lumps and produces a perfectly smooth, rounded dome.
3. Light Steam Blocking for Wing Definition: After finishing your wings, hover a handheld garment steamer or warm iron 2 inches above the pieces for 3 to 4 seconds, then press them gently between your fingertips. This instantly relaxes the acrylic or cotton fibers, keeping the scalloped tips crisp and flat rather than curled.
Cozy Styling & Display Ideas

- Spooky Tree Display: Collect dried branches from the yard, spray paint them matte black or leave them natural in a ceramic jug, and suspend three or four bats hanging upside down using black thread.
- Haunted Fireplace Garland: Alternate crochet bats with our mini crochet ghosts and wooden beads along natural jute twine for an organic cottagecore Halloween tablescape.
- Bag Charm / Keychain: Thread an antique bronze swivel clasp onto the crown of the head before closing for a stylish autumn tote accessory.
- Boo Basket Topper: Tie a finished bat onto treat bags or gift baskets filled with autumn sweets for neighbors, teachers, and craft friends.
Care & Storage Guidelines
- Spot Cleaning: If dust or lint collects on black cotton yarn, dab gently with a damp microfiber cloth or a lint roller. Avoid soaking or machine washing to preserve the delicate wing shaping.
- Reshaping: If wings become crumpled during storage, simply pinch the picot points flat with slightly damp fingers and allow to dry completely.
- Off-Season Storage: Store in a breathable cotton pouch or rigid box with cedar chips to protect against dust and fiber damage until next Halloween.
Pattern Summary & Quick Reference
Pattern Name: Mini Halloween Crochet Bat Amigurumi
Category: Seasonal Holiday Decor / Amigurumi
Suggested Hook: 3.5 mm (US E-4)
Yarn Weight: Worsted (#4) Cotton / Acrylic Blend
Total Yardage: ~25–30 yards (Black/Charcoal)
Time Commitment: Approx. 20–25 minutes
Author: Elena Hayes (Crochet & Fiber Arts Lead)
Frequently Asked Questions
Can I use fluffy plush or chenille blanket yarn for this bat pattern?
Yes! If using super bulky chenille or blanket yarn, size up to a 6.0mm or 7.0mm crochet hook and use 12mm safety eyes. The pattern stitches remain identical, resulting in an oversized, ultra-cuddly palm-sized bat.
How do I make the bat hang upside down naturally?
Simply thread a 10-inch length of clear nylon monofilament or black thread through the bottom center cinch between Rounds 12 and 13. Tie a small knot inside, letting the bat dangle naturally head-down from branches or ceiling hooks.
Are safety eyes safe for baby nursery decor?
While safety eye washers lock securely, plastic parts always present a choking hazard for infants and toddlers under 3 years old. For baby-safe nurseries, embroider French knots or sleeping crescents using black cotton embroidery floss.
Pin This Free Halloween Crochet Pattern
Love this spooky cute project? Save this pin to your Halloween Crochet or Autumn Crafts board on Pinterest so you have it ready whenever holiday crafting fever strikes!