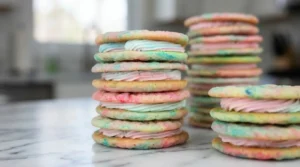
Cotton Candy Cookies
There’s a certain whimsy that fills my kitchen when I create something special, like these Cotton Candy Cookies. One rainy afternoon, inspired by the sound of raindrops, I decided to transform the joy of cotton candy into delightful cookie sandwiches. Their bright colors and sweet flavors brought back fond memories and brightened the dreary day.
The magic of these cookies lies in the balance of baking soda and baking powder, which together ensure a soft, tender crumb. This creates an enjoyable contrast with the luscious cotton candy buttercream that completes the experience.
Ingredients in Cotton Candy Cookies
- Granulated Sugar: This ingredient sweetens our cookies, creating that signature taste that pulls at the nostalgia of childhood fairs.
- Unsalted Butter: At room temperature, this luscious fat provides a tender crumb and rich flavor while helping create that fluffy texture we all crave in cookies.
- Buttermilk: A secret weapon for moisture! It adds a slight tang that enhances the sweetness and maintains that soft, chewy texture we desire.
- Egg: The binding superstar! It gives our cookies structure and keeps everything beautifully together while also adding richness.
- JRC Liquid Cotton Candy: This is where the magic begins! This flavoring captures the playful essence of cotton candy, transforming our cookies into a carnival in your mouth.
- All-Purpose Flour: The backbone of our cookie dough, providing structure and a lovely base for all the delightful flavors to come together.
- Baking Soda: This leavening agent helps our cookies rise to just the right height, contributing to the tender texture we’re aiming for.
- Salt: Just a pinch! It balances the sweetness and enhances all the flavors, making each bite a harmonious experience.
- Baking Powder: This works in tandem with baking soda, ensuring our cookies have softness while developing a beautiful rise.
- Soft Pink Gel Food Coloring: A tiny drop adds a whimsical touch of color, invoking the cheerful spirit of cotton candy.
- Sky Blue Gel Food Coloring: This color complements the pink, creating a fun and vibrant swirl that brings these cookies to life visually.
- Confectioners’ Sugar: Essential for our buttercream, it adds the perfect sweetness and smoothness to achieve that fluffy texture we adore.
- Cotton Candy Buttercream Flavoring: Just like in the cookies, this captures the fun essence of cotton candy, making for a frosting that’s equally delightful.
- Garnish: For an extra whimsical touch, consider adding colorful sprinkles on top of your finished cookies! They add texture and a pop of fun.
Each ingredient plays a part in crafting these enchanting Cotton Candy Cookies, creating a balance of flavors and textures that will have everyone smiling!

How to Make Cotton Candy Cookies
Ready to turn your kitchen into a carnival of flavors? With a total time of about one hour, you’re just a few steps away from these Cotton Candy Cookies. Let’s dive into this sweet adventure and create some magic together!
- Preheat Oven:
Preheat your oven to 350 degrees F and line two baking sheets with parchment paper. The smell of butter and sugar is about to fill your kitchen, setting the stage for the fun to come! - Cream Butter & Sugar:
In the bowl of a stand mixer fitted with the paddle attachment, cream together 1-1/4 cups of granulated sugar and 1/2 cup of room temperature unsalted butter on medium speed for 2 to 3 minutes, until the mixture is light and fluffy. You’ll notice it get airy and have a lovely sweet aroma wafting through the air! - Mix Wet Ingredients:
In a small bowl, whisk together 1/4 cup of buttermilk, 1 egg, and your cotton candy flavoring (1 teaspoon JRC Liquid Cotton Candy). With the mixer on low, slowly pour this mixture into the creamed butter and sugar, mixing until fully incorporated. Scrape the bottom of the bowl and mix for another 15-30 seconds until combined. - Combine Dry Ingredients:
Add 2-1/4 cups of all-purpose flour, 3/4 teaspoon baking soda, 1/4 teaspoon salt, and 1/2 teaspoon baking powder to the wet mixture. Mix on low speed until just combined. The dough should pull cleanly away from the sides of the bowl. If it feels a bit dry, add a teaspoon of buttermilk at a time until it’s easily scoopable—a tactile sign of success! - Add Colors:
Divide the cookie dough into two medium bowls. To one bowl, add a drop of soft pink gel food coloring and mix until the color is uniform. In the other bowl, add a drop of sky blue gel food coloring. Gently swirl both colors together in one bowl, taking care not to overmix. The colors are truly a feast for the eyes! - Scoop & Flatten:
Using a 1-1/2 inch scoop, portion out the dough onto your prepared baking sheets, leaving about two inches of space between each scoop. Flatten each cookie to about 2-1/2 inches in diameter using the base of your palm. - Bake Cookies:
Bake for 6 minutes or until the edges start to brown. Keep an eye on them—if they need another minute or two, trust your instincts. The cookies should be soft, inviting, and just slightly golden! - Cool Off:
After baking, allow the cookies to cool on the baking sheets for 5 minutes before transferring them to a wire rack to cool completely.
Embrace the wonder of baking! You’re just about ready to assemble your delightful cookie sandwiches with that luscious buttercream. Enjoy the process!

Creative Variations on Fun-Filled Treats
Let’s dive into some fun variations that can sprinkle a little extra joy into these Cotton Candy Cookies. Playing with flavors has always been one of my favorite ways to get creative in the kitchen!
- Alternative Flavoring: If you’re feeling adventurous, try using a different cotton candy flavoring, like blue raspberry or strawberry! Each brings its own unique sweetness, letting you customize the cookie experience to your taste.
- Cotton Candy Sugar Swap: For an authentic twist, you can blend actual cotton candy sugar to replace some or all of the granulated sugar in the recipe. It’ll add a delightful sweetness and a unique texture that just screams carnival fun.
- Cotton Candy Sugar Buttercream: Instead of using standard confectioners’ sugar, make your own powdered cotton candy sugar for the buttercream. Just blend the cotton candy sugar in a food processor until it’s finely ground, and enjoy that extra touch of sweetness!
- Sprinkles Galore: Consider adding colorful sprinkles to the cookie dough. They’ll create a joyful, crunchy surprise in every bite!
These playful variations will keep the cotton candy spirit alive, making each batch a little different and oh-so-exciting!
Maintaining the Sweetness of Your Desserts
To keep those delightful Cotton Candy Cookies fresh, store any leftovers in an airtight container in the fridge for up to 4 days. Before sealing them up, make sure the cookies are completely cool; this helps maintain their soft texture and prevents them from getting soggy. If you have extras that you want to save for a longer time, you can freeze them! Just pop them in a freezer-safe container, and they’ll be good for up to 3 months—trust me, they’ll still taste dreamy when you thaw them out.
When you’re ready to enjoy a cookie, a gentle reheating will do wonders. Simply pop them in the microwave for about 10-15 seconds. To keep them from drying out, you can add a small cup of water in there with them (it works like a mini steam bath!) or cover them with a damp paper towel. This way, you’ll get that soft, chewy texture back in no time!

Delightful Companions for Your Sweet Creations
Imagine biting into one of those dreamy Cotton Candy Cookies, the sweet nostalgia swirling around your taste buds. To improve this fun experience, consider pairing them with playful accompaniments that add depth and create a feast for both the eyes and palate.
- Vanilla Ice Cream: The creamy texture of vanilla ice cream complements the light sweetness of the cookies, creating a delightful contrast that feels like a carnival celebration in your mouth.
- Fresh Berries: A burst of tartness from strawberries or blueberries cuts through the sweetness, adding a refreshing touch that balances the cookies.
- Homemade Whipped Cream: A dollop of softly whipped cream can enhance the airy quality of the cotton candy flavor, making every bite feel ethereal.
When it comes to garnishing, a few playful touches can turn your dessert into a stunning presentation:
- Rainbow Sprinkles: Their crunch adds a fun texture and visual appeal, perfectly echoing the whimsical spirit of the cookies.
- Cotton Candy Floss: A touch of light pink or blue cotton candy on top adds a charming flair, elevating the experience to something truly magical.
- Chocolate Drizzle: A drizzle of rich chocolate can create a decadent contrast, marrying the sweetness of the cotton candy with a hint of dark sophistication.
As you enjoy this enchanting treat, I’d love to hear—what’s your favorite way to add a sprinkle of joy to your baking adventures?
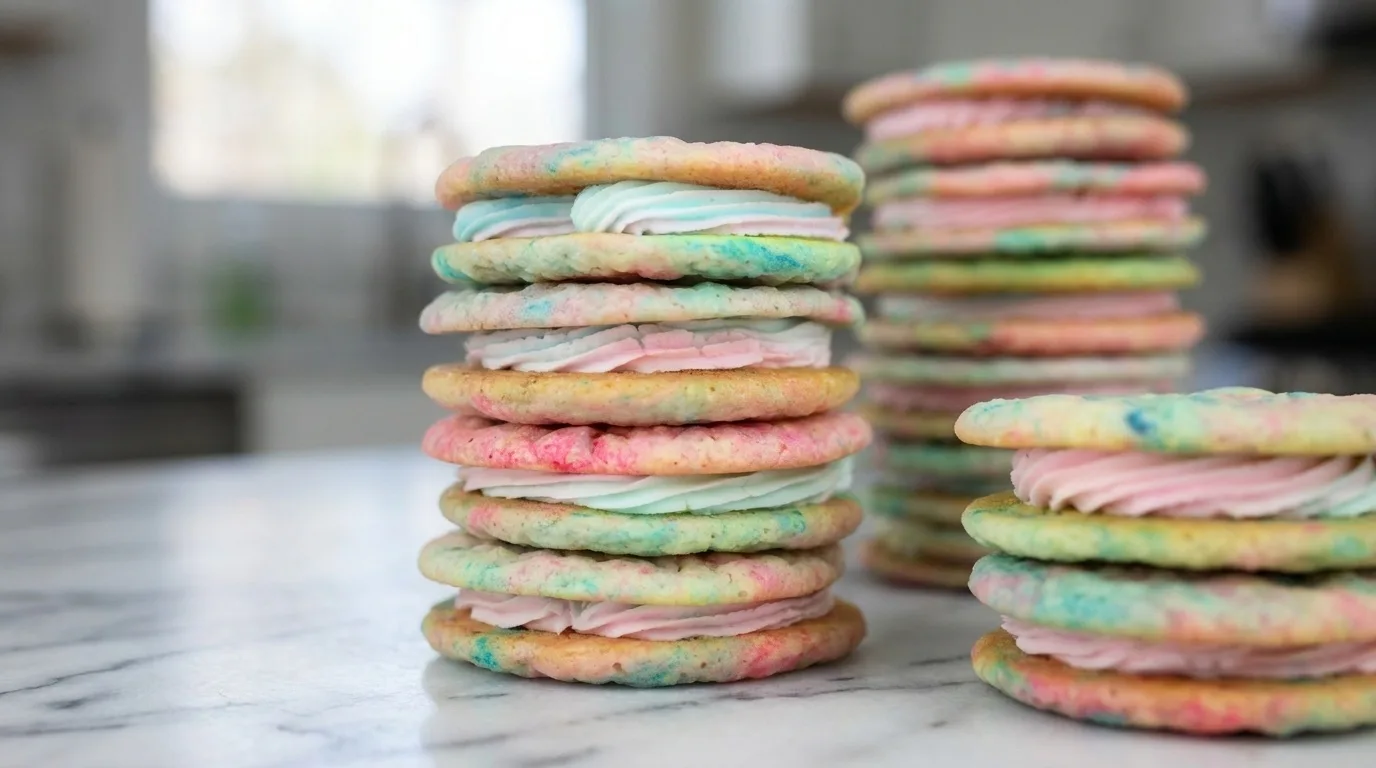
Cotton Candy Cookies
Ingredients
Method
- Prepare sugar cookies: Preheat oven to 350 degrees F and line baking sheets with parchment paper.

- In the bowl of a stand mixer fitted with the paddle attachment, cream the sugar and butter on medium for 2 to 3 minutes until light and fluffy.
- In a small bowl, whisk together the buttermilk, egg, and cotton candy flavoring. With the mixer on low, slowly pour the buttermilk mixture into the butter mixture and mix until fully incorporated. Scrape bottom of the bowl with spatula and mix for an additional 15-30 seconds until combined.

- Add flour, baking soda, salt and baking powder to the wet ingredients and mix on low speed until just combined. Dough is fully mixed when it comes together and pulls clean away from the sides of the bowl. If mixture is dry, add a teaspoon of buttermilk at a time until you can easily scoop it.
- Divide cookie dough evenly between 2 medium bowls. To one bowl, add a drop of the soft pink food coloring. Mix by hand or knead to combine until mostly pink. To the other bowl, add a drop of the sky blue food coloring with a toothpick and combine until mostly blue. Place both doughs in a medium bowl and gently swirl together, being very careful not to over mix.
- Using a 1-1/2 inch scoop, scoop dough onto prepared baking sheets two inches apart. Using the base of your palm, flatten cookies to about 2-1/2 inches in diameter.
- Bake for 6 minutes until the edges start to brown. Cool on baking sheets for 5 minutes before transferring to a wire rack to cool completely. NOTE: I ended up baking mine longer than the original recipe calls for – about 10 minutes - because the cookies weren't quite done. Check your cookies at 6 minutes and bake longer if needed.
- Prepare buttercream: In the bowl of a stand mixer, beat butter for about 2 minutes. With mixer on low, slowly add confectioners’ sugar. Increase speed to medium high and beat for 2 minutes until light and fluffy. Add cotton candy flavoring. Beat on high for another minute.
- Divide buttercream evenly between two medium bowls. To one bowl, add a drop of the soft pink food coloring and mix until the color is uniform. Repeat with blue food coloring and the second bowl of buttercream.
- Assembly: Transfer cotton candy buttercream to a piping bag fitted with a No. 8B tip by adding small scoops to the bag and alternating between the pink and blue buttercream.
- Flip over half the cookies and pipe buttercream starting in the center of the cookie and moving outward in a circular motion. Leave 1/2 inch ring of the cookie exposed around the exterior edge.
- Place the remainder of the cookies, right side up, on top of the buttercream and press down gently to make them stick. The buttercream will spread slightly to the edges of the cookies.
- Place the finished cookie sandwiches the fridge to chill for easier handling. Store cookies in an airtight container in the fridge for up to 4 days.