Nothing adds handmade warmth and nostalgic holiday cheer to your home quite like miniature heirloom accents, and this mini crochet christmas stocking pattern free tutorial lets you whip up charming farmhouse stockings in just twenty minutes each. Perfectly sized to hold standard gift cards, chocolate treats, or fresh sprigs of fragrant cedar pine, these pint-sized stockings are the ultimate fast, satisfying project for holiday gift giving and cozy festive decor.
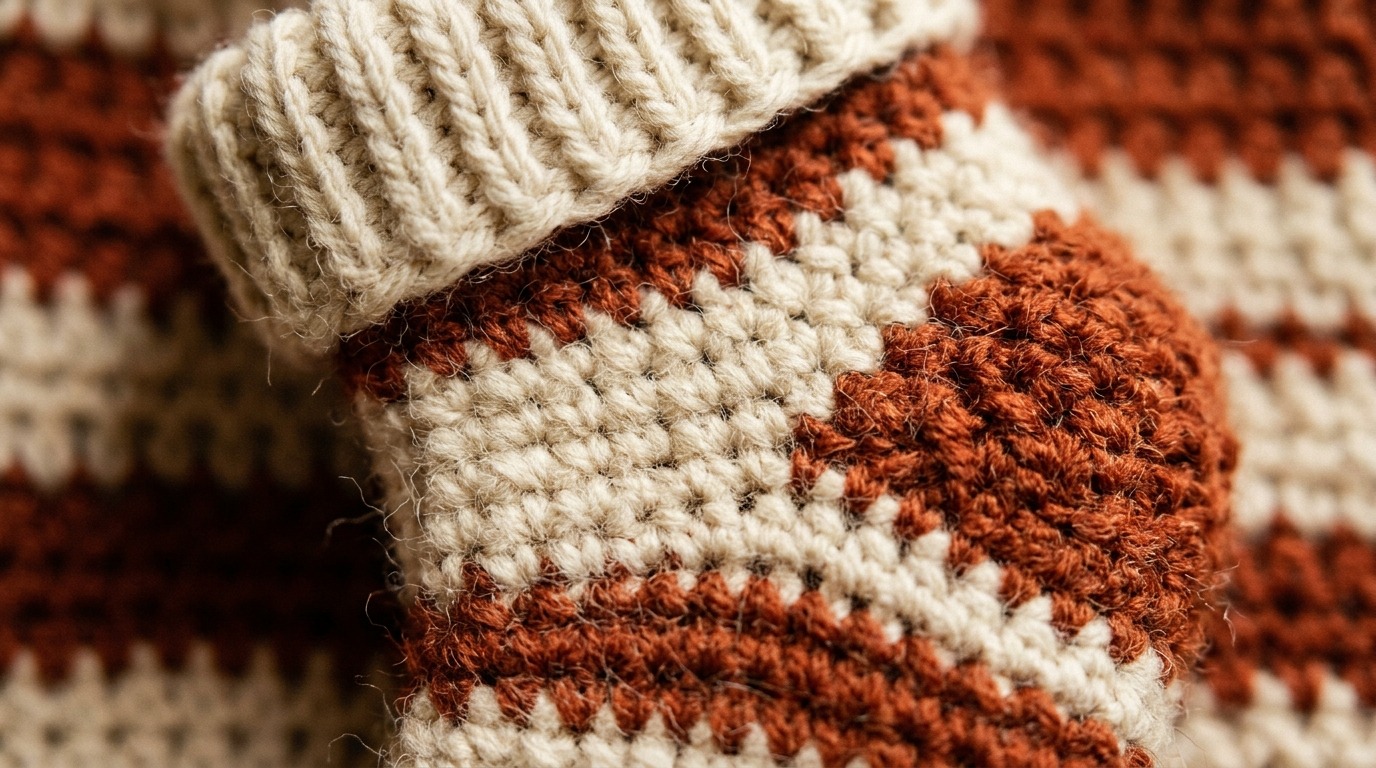
While many miniature patterns cut corners by skipping the heel and creating a tubular sock, our design features a simplified afterthought heel flap that produces that classic curved stocking silhouette without tedious sock-knitting mathematics. Worked from the toe upward in continuous rounds, you can easily customize the color blocking—pairing heritage oatmeal cream with warm terracotta rust and forest pine green for a timeless modern rustic palette.
Why You’ll Love This Pattern
- 20-Minute Quick Craft: Small and lightning-fast, you can easily crochet an entire set of six stockings over a single relaxing evening by the fireplace.
- Ideal Gift Card Holder: Sized at approximately 5.5 inches tall and 3 inches wide, standard store gift cards, folded cash, or festive candy canes tuck neatly inside.
- Zero Waste Stash Buster: Uses tiny 20- to 25-yard remnants of worsted yarn, making it the perfect seasonal stash-buster to finish off holiday skeins.
- Versatile Display Options: Clip them along natural jute twine for an advent calendar garland, hang them as rustic Christmas tree ornaments, or use them as personalized silverware holders at your holiday dinner table.
Recommended Materials & Color Palette

- Worsted Weight Wool or Acrylic (Category 4): Smooth 4-ply yarn in seasonal earthy neutrals: Oatmeal Cream, Terracotta Rust, Forest Pine Green, and Cinnamon Brown (approx. 25 yards per stocking).
- 4.5mm (US 7) Ergonomic Crochet Hook: Provides firm, tight gauge so small treats and cards cannot peek through the stitches while keeping your hands comfortable.
- Blunt Tapestry Needle & Sharp Scissors: For weaving in ends securely inside the toe and heel.
- Mini Wooden Clothespins & Jute Twine: For assembling a charming fireplace mantel or wall garland.
- Small Cinnamon Sticks & Cedar Greenery: Tucked into each stocking cuff to add natural scent and woodland styling.
Step-by-Step Mini Stocking Walkthrough
1. The Seamless Toe: Start with cream yarn in a magic ring. Work 6 single crochets (SC) into the ring. In round 2, work 2 SC in each stitch around (12 sts). In round 3, work *1 SC in next st, 2 SC in next st* around (18 sts). Work 3 rounds even to establish the rounded toe cap.

2. Foot Section & Heel Flap: Join your main body color (Terracotta or Pine Green). Work 5 rounds of single crochet even (18 sts). To form the heel, work back and forth across 9 stitches only for 4 short rows. Work a quick 3-stitch decrease across the center to turn the heel corner cleanly.
3. Leg & Ribbed Cuff: Rejoin your yarn in the round, picking up 2 stitches along each side of the heel flap plus the 9 held instep stitches (18 sts total). Work 6 rounds even for the leg. Switch back to cream yarn and work 3 rounds of half double crochet in the back loop only (BLO) to form a plush ribbed cuff that folds over neatly.
4. Hanging Loop & Assembly: Chain 12 from the top corner of the cuff, slip stitch back into the base, and fasten off to create a sturdy hanging loop. Weave in all yarn tails on the wrong side.
3 Maker Secrets for Heirloom Stockings
1. Use Invisible Color Changes: When switching from the cream toe to your main body color, complete the final yarn over of the last toe stitch with the new color to keep your color transitions seamless.
2. Tighten Heel Side Pickups: When picking up stitches along the side edges of the heel flap, insert your hook under two strands rather than one to prevent small gap holes from forming at the corners of the ankle.
3. Steam the Folded Cuff: Fold your ribbed cuff down by 0.75 inches and give it a gentle touch of steam. This sets the fold permanently so your stockings hang crisp and symmetrical.
4 Festive Ways to Display Your Mini Stockings

- Mantel Advent Garland: String 12 or 24 mini stockings along natural twine with wooden clothespins across your fireplace mantel alongside our rustic crochet fall leaves garland or fresh pine boughs.
- Tree Ornament Pairings: Hang them on your Christmas tree alongside our rustic farmhouse crochet tree ornaments for a coordinated handmade holiday aesthetic.
- Holiday Table Cutlery Pockets: Place one mini stocking at each dinner setting holding a fork, knife, and cinnamon stick for unforgettable Christmas dining presentation.
- Personalized Gift Packaging: Slip a gift card into the stocking and tie it directly onto wrapped craft paper parcels as an interactive gift topper.
Care, Cleaning & Seasonal Storage
- Spot Cleaning: Spot clean gently with a damp cloth if chocolate or peppermint residue occurs. Hand wash in cool water if necessary and lay flat to dry.
- Preserving Shape: Lightly stuff with tissue paper before packing away in your holiday storage totes to keep the toes plump and rounded.
- Aroma Sachet Storage: Store with dried cinnamon sticks or cedar blocks to keep the wool smelling like a winter forest year after year.
Farmhouse Mini Crochet Christmas Stocking
By Elena Hayes • Category: Beginner Patterns • Skill Level: Easy
Materials Required
- Worsted weight yarn in Cream (Color A) and Terracotta Rust or Pine Green (Color B) — approx. 25 yds total
- 4.5mm ergonomic crochet hook
- Tapestry needle & sharp scissors
- Mini wooden clips & twine for hanging
Pattern Abbreviations (US Terms)
mr: magic ring | sc: single crochet | hdc: half double crochet | blo: back loop only | sc2tog: single crochet 2 together (decrease) | sl st: slip stitch
Written Pattern Instructions
- Toe (Color A): In MR, 6 sc. Rnd 2: 2 sc in each st around (12). Rnd 3: *1 sc, 2 sc in next* around (18). Rnds 4–5: Sc in each st around (18).
- Foot (Color B): Join Color B. Rnds 6–10: Sc in each st around (18).
- Heel (Color A): Switch to Color A. Work back and forth in rows across first 9 sts only. Rows 1–3: Ch 1, turn, sc in 9 sts. Row 4 (turn heel): Ch 1, turn, sc in 3 sts, sc2tog, sc in 4 sts. (8 sts).
- Leg (Color B): Rejoin Color B in the round. Pick up 2 sts on heel side, work across 9 held instep sts, pick up 2 sts on other heel side, work across 5 heel sts (18 sts). Rnds 11–16: Sc in each st around (18).
- Cuff (Color A): Join Color A. Rnds 17–19: Hdc in BLO of each st around (18). Fasten off leaving loop for hanging, fold cuff down.
Frequently Asked Questions
Will standard plastic gift cards fit inside this mini stocking?
Yes! The stocking has an internal width of approximately 2.8 to 3.0 inches, allowing standard 3.375″ x 2.125″ plastic gift cards to slide in upright with the festive top edge peeking out.
Can I make these in bulky yarn for larger stockings?
Absolutely! If you use Category 5 bulky yarn and a 6.5mm hook, the pattern naturally scales up to approximately 9 inches tall—ideal for larger stocking stuffers.
How do I avoid holes when working around the heel flap?
When picking up stitches on the side of the heel flap, pick up one extra loop in the corner gap and single-crochet it together with the next stitch (sc2tog). This eliminates gaps completely.
Pin This Pattern for Later
Save this mini stocking tutorial to your holiday crochet board on Pinterest so you have the free pattern ready when Christmas crafting begins!