Crisp autumn air, glowing amber candles, and the sweet aroma of spiced cider all signal that harvest decorating season has arrived, and this crochet farmhouse pumpkins pattern free tutorial lets you create cozy heirloom gourds in under an hour. Topped with fragrant real cinnamon stick stems and raw jute twine bows, these plump ribbed pumpkins bring warm rustic farmhouse charm to your Thanksgiving table, mantle displays, and tiered trays.
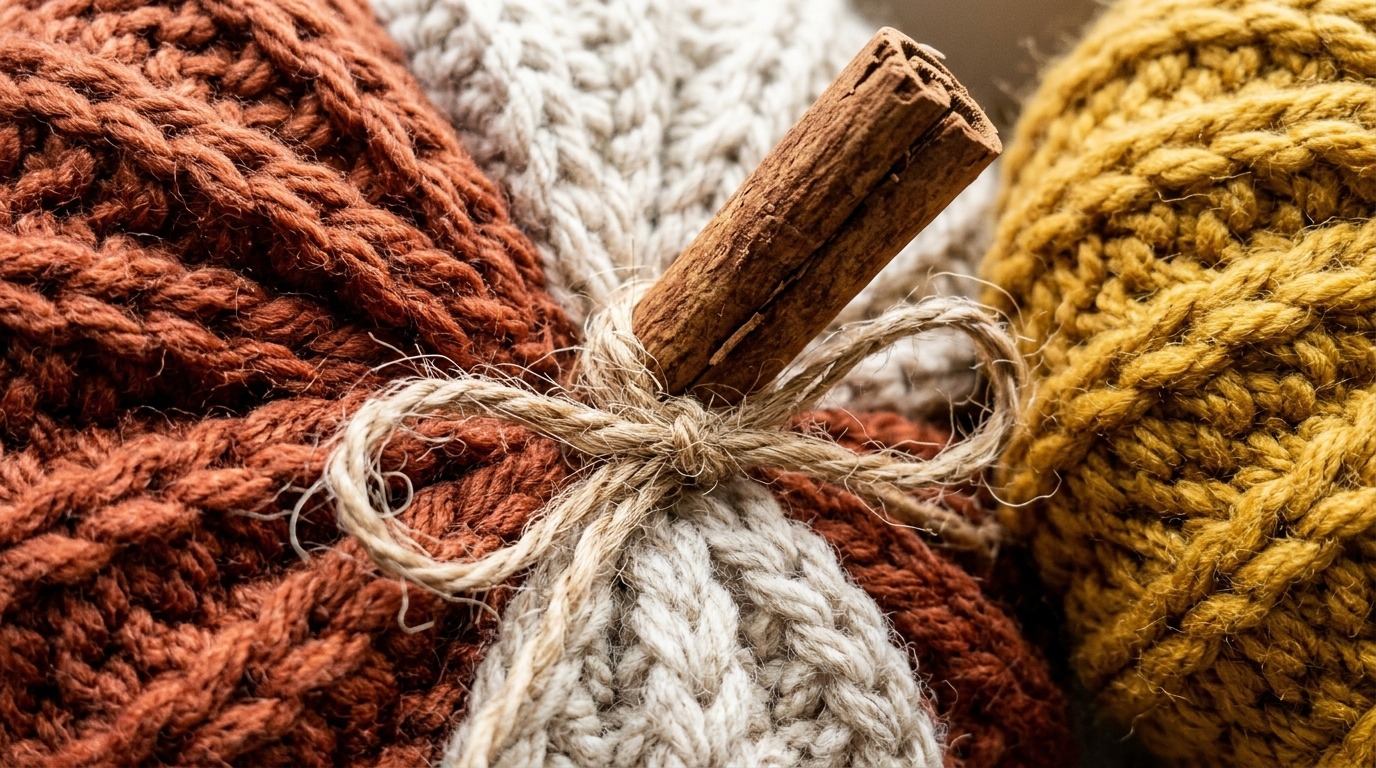
The beauty of this design lies in its clever beginner-friendly construction: instead of working tedious rounds in the spiral and constantly counting amigurumi increases, you simply crochet a flat, textured rectangle working in the back loop only. Once the panel reaches length, you sew the short edges into a tube, cinch the bottom closed with running stitches, stuff generously with fiberfill, and pull your yarn through the center to create deeply indented pumpkin segments.
Why You’ll Love This Pattern
- No Complicated In-the-Round Increases: Worked 100% flat in back-loop-only rows, making it completely accessible for confident beginners.
- Includes 3 Harmonious Sizes: Features instructions for small (4-inch), medium (6-inch), and large (8-inch) pumpkins for perfect tiered displays.
- Natural Autumn Fragrance: Using real cinnamon sticks as stems infuses your home with subtle seasonal spice every time you walk past your centerpiece.
- Ultimate Stash-Busting Craft: Uses small 40- to 70-yard remnants of worsted or bulky yarn, making it ideal for clearing out autumn yarn skeins.
Recommended Materials & Notions

- Worsted Weight Yarn (Category 4): Smooth acrylic or wool blend in rich harvest hues: Burnt Terracotta, Antique Mustard Gold, and Oatmeal Ecru (approx. 45 to 80 yds per pumpkin).
- 5.0mm (US H-8) Wooden Crochet Hook: Produces dense, tight ribbing that prevents the white fiberfill stuffing from peeking through between stitches.
- Polyester Fiberfill Stuffing: For plumping the pumpkin interior firmly.
- Real Cinnamon Sticks (3–4 inches long): Fragrant natural stems that add instant rustic authenticity.
- Raw Jute Twine: Tied in delicate bows around the cinnamon stem for woodland texture.
- Tapestry Needle & Sharp Scissors: Extra-long needle recommended for cinching and pulling the tufting segments.
- Optional Leather Craft Label (‘YumYum’): Stitched to the side for a boutique maker aesthetic.
Step-by-Step Pumpkin Making Walkthrough
1. Foundation & Ribbed Panel: Chain 25 for a medium pumpkin (approx. 6 inches height). Single crochet (SC) in the 2nd chain from hook and in each chain across (24 SC). For all subsequent rows: chain 1, turn, and work SC into the back loop only (BLO) across. Continue for 40 rows to create a stretchy, accordion-ribbed rectangle.

2. Seaming into a Cylinder: Fold the rectangle in half so the foundation row meets the final row. Slip stitch or whip stitch the two short edges together using your working yarn to form an open cylinder.
3. Cinching the Base & Stuffing: Thread a 20-inch yarn tail onto your tapestry needle. Weave running stitches along the bottom circular edge, pull tightly to cinch the base hole completely shut, and knot securely inside. Stuff firmly with fiberfill, keeping the shape round and squishy.
4. Cinching the Crown & Creating Segments: Weave running stitches along the top rim and pull tight around a cinnamon stick stem. Insert your needle straight down through the center of the pumpkin to the bottom base, wrap the yarn around the outside along the ribbed grooves, and pull tight back up through the center. Repeat 5 to 6 times to indent deep pumpkin segments. Tie off and embellish with a jute twine bow.
3 Pro Secrets for Plump, Perfect Pumpkins
1. Do Not Over-Stuff the Core: While you want the pumpkin firm, leaving a slight hollow depression in the vertical center makes it much easier to pull your needle straight through when indenting the segment grooves.
2. Align Yarn Wraps with Natural Ribs: When pulling your shaping yarn over the exterior, nestle the yarn directly into the recessed valleys of your ribbed rows. This hides the shaping strands completely while exaggerating the plumpness of the ridges.
3. Hot Glue the Cinnamon Stem: Add a tiny dab of craft hot glue to the bottom third of your cinnamon stick before inserting it into the cinched crown. This locks the stem firmly in place so it never slips out during holiday handling.
How to Style Your Farmhouse Pumpkins

- Dough Bowl Centerpiece: Group the trio in an antique wooden dough bowl alongside our rustic crochet fall leaves and acorns and dried eucalyptus.
- Thanksgiving Place Card Holders: Place a mini pumpkin on each guest’s dinner plate with a handwritten kraft paper name tag tucked under the jute bow.
- Fireplace Mantel Vignette: Space them along your mantelpiece nestled between brass candleholders and a warm neutral knitted garland.
- Hostess & Housewarming Gifts: Pack two pumpkins into our reusable farmhouse crochet market bag with a jar of artisanal apple butter for an unforgettable autumn gift basket.
Care, Cleaning & Off-Season Storage
- Dusting: Lightly brush with a lint roller or use the soft brush attachment on a vacuum cleaner to remove household dust.
- Preserving Scent: If the cinnamon stick scent fades after a few seasons, place a drop of pure cinnamon or clove essential oil directly onto the top edge of the wooden bark.
- Storage: Store packed in a cardboard box (not compressed plastic bags) so the fiberfill retains its springy bounce year after year.
Rustic Farmhouse Crochet Pumpkins (3 Sizes)
By Elena Hayes • Category: Home & Kitchen Crochet • Skill Level: Beginner
Materials & Tools
- Worsted weight yarn in Terracotta, Mustard, or Cream (45–80 yds each)
- 5.0mm (US H-8) wooden crochet hook
- Polyester fiberfill stuffing
- Cinnamon sticks (3–4″ each) & natural jute twine
- Tapestry needle & craft scissors
Pattern Abbreviations (US Terms)
ch: chain | sc: single crochet | blo: back loop only | st(s): stitch(es) | sl st: slip stitch
Size Dimensions & Stitch Counts
- Small (4″ wide x 3″ tall): Chain 18. Work 30 rows of SC in BLO.
- Medium (6″ wide x 4″ tall): Chain 25. Work 40 rows of SC in BLO.
- Large (8″ wide x 5.5″ tall): Chain 32. Work 52 rows of SC in BLO.
Assembly Instructions
- Seam foundation chain to final row using slip stitches to form a cylinder.
- Weave running stitches around the bottom edge, pull tight to cinch shut, knot securely inside.
- Stuff moderately with fiberfill stuffing.
- Weave running stitches around the top edge, pull partially closed, insert cinnamon stick stem, and pull tight around stem.
- Wrap working yarn around the outside into the ribbing grooves from top to bottom 5–6 times, pulling slightly to create rounded pumpkin segments. Knot at base, tie jute twine bow around stem.
Frequently Asked Questions
Can I use a faux stem instead of a real cinnamon stick?
Yes! You can use dried birch twigs from the garden, genuine dried pumpkin stems, or rolled strips of brown craft felt. Cinnamon sticks, however, provide the added benefit of natural autumnal aroma.
Why can I see the white stuffing between my stitches?
If stuffing shows through, your hook is likely too large for your yarn or your tension is too loose. Try dropping down to a 4.5mm or 4.0mm hook, which produces tighter, impenetrable ribbing.
How do I make the pumpkin squatter and wider?
To create a squatter pumpkin, work more rows relative to your starting chain. For example, use a chain 20 foundation and work 50 rows instead of 40.
Pin This Pattern for Later
Ready for autumn crafting? Save this rustic farmhouse crochet pumpkin pin to your fall or Halloween crochet board on Pinterest!